How to Cancel Norton Product Subscriptions and Get Refund
In the guide below I will let you know how to cancel Norton antivirus for various products. Whenever you buy a Norton product, such as Norton 360, you must create Norton accounts that will store your private information along with the product you receive. These accounts also keep your credit card information if you make an online purchase of this program.

When you register with your antivirus provider, Norton provides the ability to automatically renew your registration after your subscription period has ended. However, if you no longer want to use this support, or if your business uses a different virus protection plan, it's easy to cancel automatic renewal, as well as prevent your credit card from being charged for potential services. Cancel this attribute using Norton accounts or by submitting the webform.
As they say, for benefits, Norton automatically charges your credit card along with the amount of support for renewing the item you buy after the renewal period. This is to provide uninterrupted support from Norton. But most users are unaware of this and, as a result, pay Norton a renewal sum, even if they don't have to renew their subscription.
You can do any of the following to cancel your Norton account and receive a refund of Norton's issued money. Remember that Norton includes a 60-day money-back policy, which you can simply recover if your card is charged less than sixty days after your refund request. Get help from Norton Chat and talk to your broker.
Before you decide on any of the procedures listed above to begin the Norton cancellation process, make sure you have the following information ready:
The last four digits of the credit card used to make the online purchase. Credit card expiration date. The speech to log in to your Norton account is the email address you decided to register to.
When calling or chatting with customer service, keep the above information on hand and provide all customer service request information to initiate a Norton quick cancellation procedure to return your cash.
If you fall out of a 60-day return period, you can still choose to use the product. If the item has been removed from your computer, you can download it and reinstall the product. To achieve this: Log in to your Norton account. Click Install Norton. Make sure you turn off automatic renewal by moving the slider (under the Automatic renewal heading) to "Away". Check your option to disable automatic renewal.
Cancel your Norton subscription Before you charged
If you haven't received your invoice yet, you can cancel the automatic renewal service without having to contact anyone. Log in to your Norton account. Under automatic renewal, move the slider to the "Away" position. Check your option to disable automatic renewal.
Remember that every time you provide a credit card, it turns out that when connected to a subscription, most companies will automatically renew - this is not invented by Norton. Look carefully at the fine print and make sure you make the choice to opt-out of these "suppliers".
Success strategies
If you decide to complete the Norton online cancellation form, you must wait 2-3 times before getting a response from the service group, and this procedure may take even longer, depending on the circumstances. In my experience, a much better result can be obtained by calling customer service. It is also possible to ask a customer service representative to eliminate the automatic account settlement in case you are still in the registration phase. In these cases, the agent will get rid of your credit card information stored in files from your Norton accounts and you will not be charged for some of these services.
Brief Guide on “How to Fix Malwarebytes Not Working On Windows 10”.
Malwarebytes anti-malware solution is just one of the most common anti-virus programs in the world. Recently, several consumers of this application have complained that they Malwarebytes not working after update. This may be due to a viral disease that stops Malwarebytes from working.
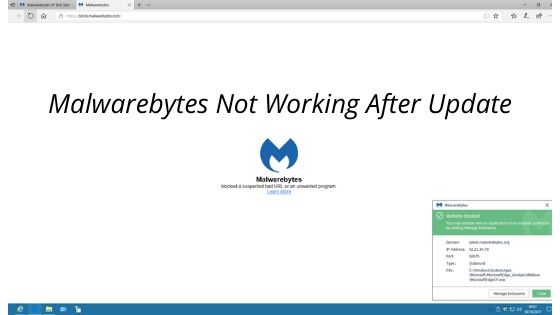
What Malwarebytes Anti-malware does not start?
Users can report that Malwarebytes is not working properly and will not start either. We've analyzed and discovered several reasons that can activate antimalware malfunction. The motive may be no circumstances, damaged program, configuration errors or other technical difficulties. The most common cause of Malwarebytes not working is a viral disease.
We've provided some basic solutions that you can easily apply, even if you don't know much about technology. Follow the instructions below and fix the Malwarebytes problem on your own.
Rename explorer.exe to mbam.exe
By rating the executable, most users have solved problems with their Malwarebytes program. The implementation of this file may be stopped due to malware attacks. You will need administrative permission to rename files. Follow these instructions to make the modifications: Now click mbam.exe and choose rename from the menu. Rename the mbam.exe file to explorer.exe and run the application.
It is always recommended to run the application with administrative approval to prevent any matter.
You want to go to C: Program Files \ MalwarebytesAnti-Malware, click mbam.exe and select Properties from the context menu. Now you need to run the Compatibility tab.
Run Malwarebytes as an Administrator
In the event that Malwarebytes is not working due to virus attacks, it is possible to run Malwarebytes chameleon. An infected system can cause problems with several other programs. An effective chameleon tool is already present in Malwarebytes antivirus software for protection. After the virus tries to attack a malware application, the chameleon tries to protect the anti-virus from the inside.
Malwarebytes Chameleon
To carry out Malwarebytes Chameleon, you want to follow these instructions: Use the official website to get to the Malwarebytes chameleon. After the download is complete, unzip the contents to the specified folder. Then open the SHM Helo record and follow the instructions. It is also possible to double-click them for documents. Follow the instructions on the screen.
Run Malwarebytes in safe mode. It will limit this malware before it generates risk and resists Malwarebytes.
Practice the following measures to boot in safe mode:
Shut down the computer by pressing and holding the power button. Turn on and repeat the process 3 times. The Advanced Recovery menu may look like 4 for a while. Then you need to decide to solve the problem and choose advanced options. Now click Startup Settings. Click Restart and select Safe Mode with Networking from the list. Restart your computer and check if it scans properly via Malwarebytes.
For example enter "controller" in the search box, and after opening the Control Panel select "Uninstall an application", select Malwarebytes from the list of installed applications and select Uninstall to remove the program from the system. Download and install the latest version of all Malwarebytes and evaluate if this solves the situation.
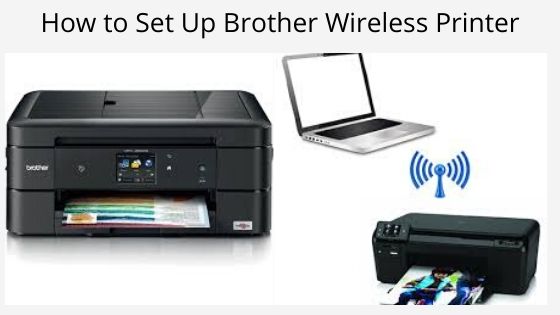
How to Fix Brother printer does not automatically connect to Wi-Fi.
When the Brother printer does not mechanically connect to Wi-Fi, you need to reset the system settings for your own Wi-Fi and brother to contact each other. Switch to the power of your Brother printer. Press the menu button, click the arrow with the button, and then click OK. Click button 1 to manually reset the system procedure. Finally, your Brother printer will start a system reset. When finished, you should try to connect brother printer to wifi. Make sure you connect the Brother printer to the Wi-Fi to which your computer is connected. Then ensure a secure connection between your brother and computer. Connect the Brother printer to the power cable twist on your computer and insert the printer driver so that the printer can take control of printing.
- Restart the computer, connect 1 end to the USB port and the other end to the USB cable interface, and then connect the other end to the available USB port on the computer.
- USB ports are attached to a few USB ports near the sound jack and power cord.
- Visit the official Brother printer page, scroll down and click the official Brother printer page, and then click the download links in the left column.
- Select a printer in the selected product group.
- And the Choose printer version drop-down menu, now select the view button and then move. Click the link below.
- Select the laptop operating system, now select the language and search for the desired language according to your native state.
- Install the printer driver to make this laptop work smoothly. After installing them, save the changes and restart the printer to make sure that the printer is properly configured and working correctly.
The best way to connect your Brother printer to Wi-Fi: make sure the power cord is connected. Turn the machine on and get it ready. Hold the WPS button at your own wireless LAN access point with a router at the WLAN entry point button for a few seconds. Press the wireless configuration button on the back of the device. See the documentation that came with your own printer.
Wi-Fi lights will flash after establishing a secure computer connection and the printer will display a message that the system has successfully completed.
- You can also configure the Brother HL printer using a Wi-Fi router in this way.
- Wait until the system card of this printer is flashing to the factory settings. Click the wireless card in the printer. Open a browser on your computer.
FIX: Malwarebytes Will Not Upgrade on Windows 10
The comprehensive protective nature of Malwarebytes puts it at the top of this free antivirus market. The most important package, in addition to dealing with these unbearable germs, also copes with PuP and anti-virus. Both free and premium variants of this package. On the other hand, integration with Windows 10 (e.g., using many third-party options) neglects users. Namely, many of them are unable to update the client, even after several attempts.
We conducted an internet hunt and provided some practical solutions. Give them a chance and let us know if they work.
Malwarebytes not opening windows 10. Here's what you need to do

1: Install updates manually
First of all, we want you to do something before manually installing the update. The first thing you should do is confirm that Windows Defender is turned off. 2 antimalware services in combination with real-time protection enabled and operating at exactly the same time is not the best idea.
With the first installation, the system mechanically simplifies the Defender, but this may change after a significant update. Go to Windows Defender> Hotmail and Threat Protection> Display Security and Threat Settings and disable real-time protection.
Then restart your computer and launch Malwarebytes. Go to Settings and on the Program tab click Install application updates.
Another factor related to checking is the Windows Firewall. As we mentioned in the previous step, a significant update can really make significant changes to the system. Including interference with Firewall permissions. For this reason, we invite you to browse the Windows Firewall configuration and allow Malwarebytes to communicate openly with the update server.
Here's what you need to do:
- In the Windows search bar, type Allow and start allowing the program through the Windows Firewall.
- Click "Change preferences.
- Click "Let another program".
- Browse to the installation folder, and then insert the executable file.
- Let it communicate openly with public and personal networks.
- Check the changes and restart the computer.
- Consider again the Malwarebytes update.
3: Reinstall Malwarebytes
Currently, if you have installed an earlier version of Malwarebytes (or some other anti-malware applications), the remaining linked files may damage your current configuration. Therefore, some of the main functions may not work as planned. It requires a full reinstallation of this program.
However, as we said, the antivirus contains much deeper than a regular third-party application. That is why the great people at Malwarebytes provide a special tool that should allow you to wash all related files. Then it is possible to install Malwarebytes also hopefully upgradeable without any difficulty.
Here's what you need to do:
- Run the application and read the terms of the EULA.
- The application starts with the uninstall process and finally prompts you to restart.
- Restart your computer.
- After the restart,
- choose to install the latest version of all Malwarebytes.
4: Update Windows
And, finally, we must recall one of the most common reasons for not updating. Important Windows 10 updates are known for breaking third-party applications. Most reports on Malwarebytes update issues appeared after a major update (namely, developer updates).
With this in mind, you should configure system patches and updates whenever possible. We hope that some of them should help you solve the problem. To make sure all updates are on stage, please check for updates. Follow these steps to test Windows 10 updates:
- Open Preferences.
- Select Update and security.
- Click Check for updates
- Install all available updates and restart your computer.
- Assess if the customer can upgrade.
This is it. If you are still harassed with the exact same error and cannot recover the latest Malwarebytes updates, make sure you talk about your queries in their forum.
How to Turn Off or Disable Bitdefender Temporarily?
As a person from the World Wide Web, you always have to worry about your system and information stored on your system. It's not a big deal to worry about your information or your own system, but it turns into a bigger deal if you don't protect your system from the threats that cause stress.
To protect your data and system on the World Wide Web, you should use an antivirus program that will provide full protection against viruses and malware that can affect your system. Bitdefender Antivirus is a fantastic option for you, and to learn more about the steps how to stop Bitdefender auto-renewal, you must visit our website.

It is a special and very strong antivirus program with the ability to protect against all kinds of problems that can cause problems in the system and can affect the system along with your information. This choice is usually chosen by users only if there is a new Bitdefender anti-virus update and it affects the functioning of the system.
To help the consumer solve the problem, as well as help him turn off BitDefender We have temporarily provided some resources that would help you in this process and also could enable you to perform the task without affecting the functioning of your system. In this case, you need to follow the steps to update BitDefender Antivirus, and then you can check our site for measures that would provide immediate solutions.
Steps to Turn Off or Disable Bitdefender Temporarily
- To start the procedure, double-click the Bitdefender antivirus icon that is available in the background of the device. On the left, you will see the option Virus protection, click this option. Click Selection to continue using the Procedure to temporarily disable Bitdefender.
Because you click the selection, black will turn red. Since you can do this, Hotmail Shield is Disabled, the option will be displayed on the monitor.
- After doing so, move the mouse to the upper right corner and then click the down arrows to continue the procedure.
- Because you click the arrow, you will see that Bitdefender is currently the inactive selection displayed on the monitor.
- after completing each of these steps you will be able to temporarily disable Bitdefender.
These measures are extremely unique and provide complete solutions for your procedure. Once you have followed each of these steps correctly, you will be able to temporarily disable Bitdefender. Each of these measures is real and provides full answers to the needs of this procedure.
It is very important for the consumer to know about all the features of the anti-virus they use. Understanding the features of this anti-virus, a person can learn more about methods. There are many ways in which Bitdefender anti-virus helps users through its attributes and to learn more about these features, such as configuring custom scan using Bitdefender along with other security attributes of this anti-virus, browse our site and go through our pages that offer comprehensive Item details. You will find all the information related to the anti-virus, as well as information on various products that help users in the security of the system.
How to Connect Canon mg3600 Printer to Wi-Fi?
When you recently bought a canon mg3600 wifi printing device for office or home use, the first thing you need to do is gently close the box and remove all accessories, and then place the device on the desk. Then collect all the cable that is included with this printing device, and then connect it to your preferred port. Thanks to the automatic WPS connection means a protected Wi-Fi configuration, you can connect your own devices. This allows both the device, computer, and printer to contact each other on their own network without entering a password, and then allows a quick and easy way to connect devices. By hiring a Canon support agency, you can get help because there are licensed and extremely talented technicians operating here.

Approach to configuration Canon PIXMA MG3600
If your access point has a WPS button, without any doubt choose the "WPS connection method" because this procedure is by far the simplest method of connecting a PIXMA printer. Just take a look at these lines and follow the same instructions as for the guide:
- First of all, make sure the printer is ON and the WPS button on the router is available.
- Now press and hold the Wi-Fi button on the printer before the ON light flashes.
- Now make sure the Wi-Fi lamp flashes quickly and the ON lamp is on. Then visit the entry point and then press the WPS button in a few moments.
- Then you will notice that the blue Wi-Fi lamp on the printer will flash when hunting, and the power and Wi-Fi lights will flash when connecting to the access point. When the printer is connected to the wireless system, the power and Wi-Fi lights will stop blinking and stay on.
- In the long run, make sure the Wi-Fi lamp and ON lamp is on.
After completing the above process, the system link installation is now complete.
If the device is not connected, go to another method.
If your access point does not support the WPS attribute, follow the instructions below to set up the printer on a wireless system:
- Click "Start configuration" when the first screen appears
- The program will now check the driver for updates. The download will start automatically when it needs to be updated. Wait a few minutes.
- Select area and status and click "Next"
- If you want to participate in this extended survey program, click "I Agree", click "I Disagree".
- Click "Next" to allow everyone "Wizard installation procedure".
- Make sure the printer is on and then press "Next".
- Make sure that the "Cannot find a printer in the list" option is selected, and then tap "Next".
- The installation guide begins, all you want to do is follow the on-screen instructions carefully.
- Wait a moment for the installation to detect the printer.
- After the installation is finished, click "Next".
- And click "Exit".
Does Macfee Scanner Slow Computer?
According to reports, many people said that there was other computer equipment that they slowed down after installing any antivirus program or security package.
Today we will learn about the McAfee making computer slow.
McAfee anti-virus software has many features and functions, but this variety of options can cause problems on some computers, especially older ones. McAfee allows you to scan your computer and update automatically, but these operations take up RAM and bandwidth, providing less electricity for work.

McAfee can also slow down your computer if it is not capable of operating it, if you have an older machine, it may not meet system requirements.
- You can use the same actions to solve virtually any antivirus program -
- The basic allergy that fixes the slowdown -
- Make sure that the configuration has been made correctly and the product is up to date.
- Update your system again Check to see if it helps.
Let's find out more about this problem and try to fix the matter using quick and simple steps.
Why is my computer slow after installing McAfee Antivirus?
If you are a Windows or Mac user, you must be aware of McAfee Antivirus, which was previously one of the very popular antivirus applications. However, as we understand everything has a price, and McAfee does it.
McAfee constantly stutters and delays the computer, because it uses most of the resources all the time, which makes windows convinced, and this takes some time, and finally, the computer begins to slow down these elements.
The installation of the anti-virus program may also be necessary because in most cases it saves your computer from most malware and viruses while using the Internet or simply by connecting a USB stick that was previously connected to the infected computer. Many people have slowed their computers after installing McAfee. We now provide a number of tips so you can create your computer a little faster and at the same time provide protection.
So initially let's see what McAfee really does when the computer is running slowly, McAfee really constantly protects the C drive, and thus checks every file in the temporary folder, tests every file that tries to get the registry or other driver files.
Now they are not damaged and thus get the computer layout from the same and thus really leave fewer resources to operate the computer. In this way, the computer starts to hang.
Step 1 - Changing the configuration from continuous security to continuous supervision
- Open the McAfee application
- Change the option on the Protection tab from Continuous security to Continuous monitoring.
- This really keeps the application under surveillance, but when we browse untrusted sites, we need to provide full protection for McAfee to keep us protected.
And we really should manually scan after adding a new disk from the computer, which means we need to be really aware of using McAfee in continuous supervision mode.
Step 2 - Avoid using McAfee's system resources
Avoid using McAfee's system resources. Type "MSConfig" from the search bar.
Uncheck the boxes associated with the McAfee manufacturer registered near the product.
You can actually disable McAfee's ongoing scanning and really blatantly perform daily scans over the long run, it can actually stop it from interfering with our work, and we could continue our work without slowing down the computer.